Painting St Odelia Step-by-Step: Garments (Part 2)
In Part 1 of this tutorial we started with the underpainting and now we’re going to be painting the garments. I will be linking the real time bonus videos that are available on Patreon for this icon.

Bonus Video Collection
You can now purchase access to all the real-time bonus videos for the St Odelia blog tutorials for €20 without a Patreon subscription here.

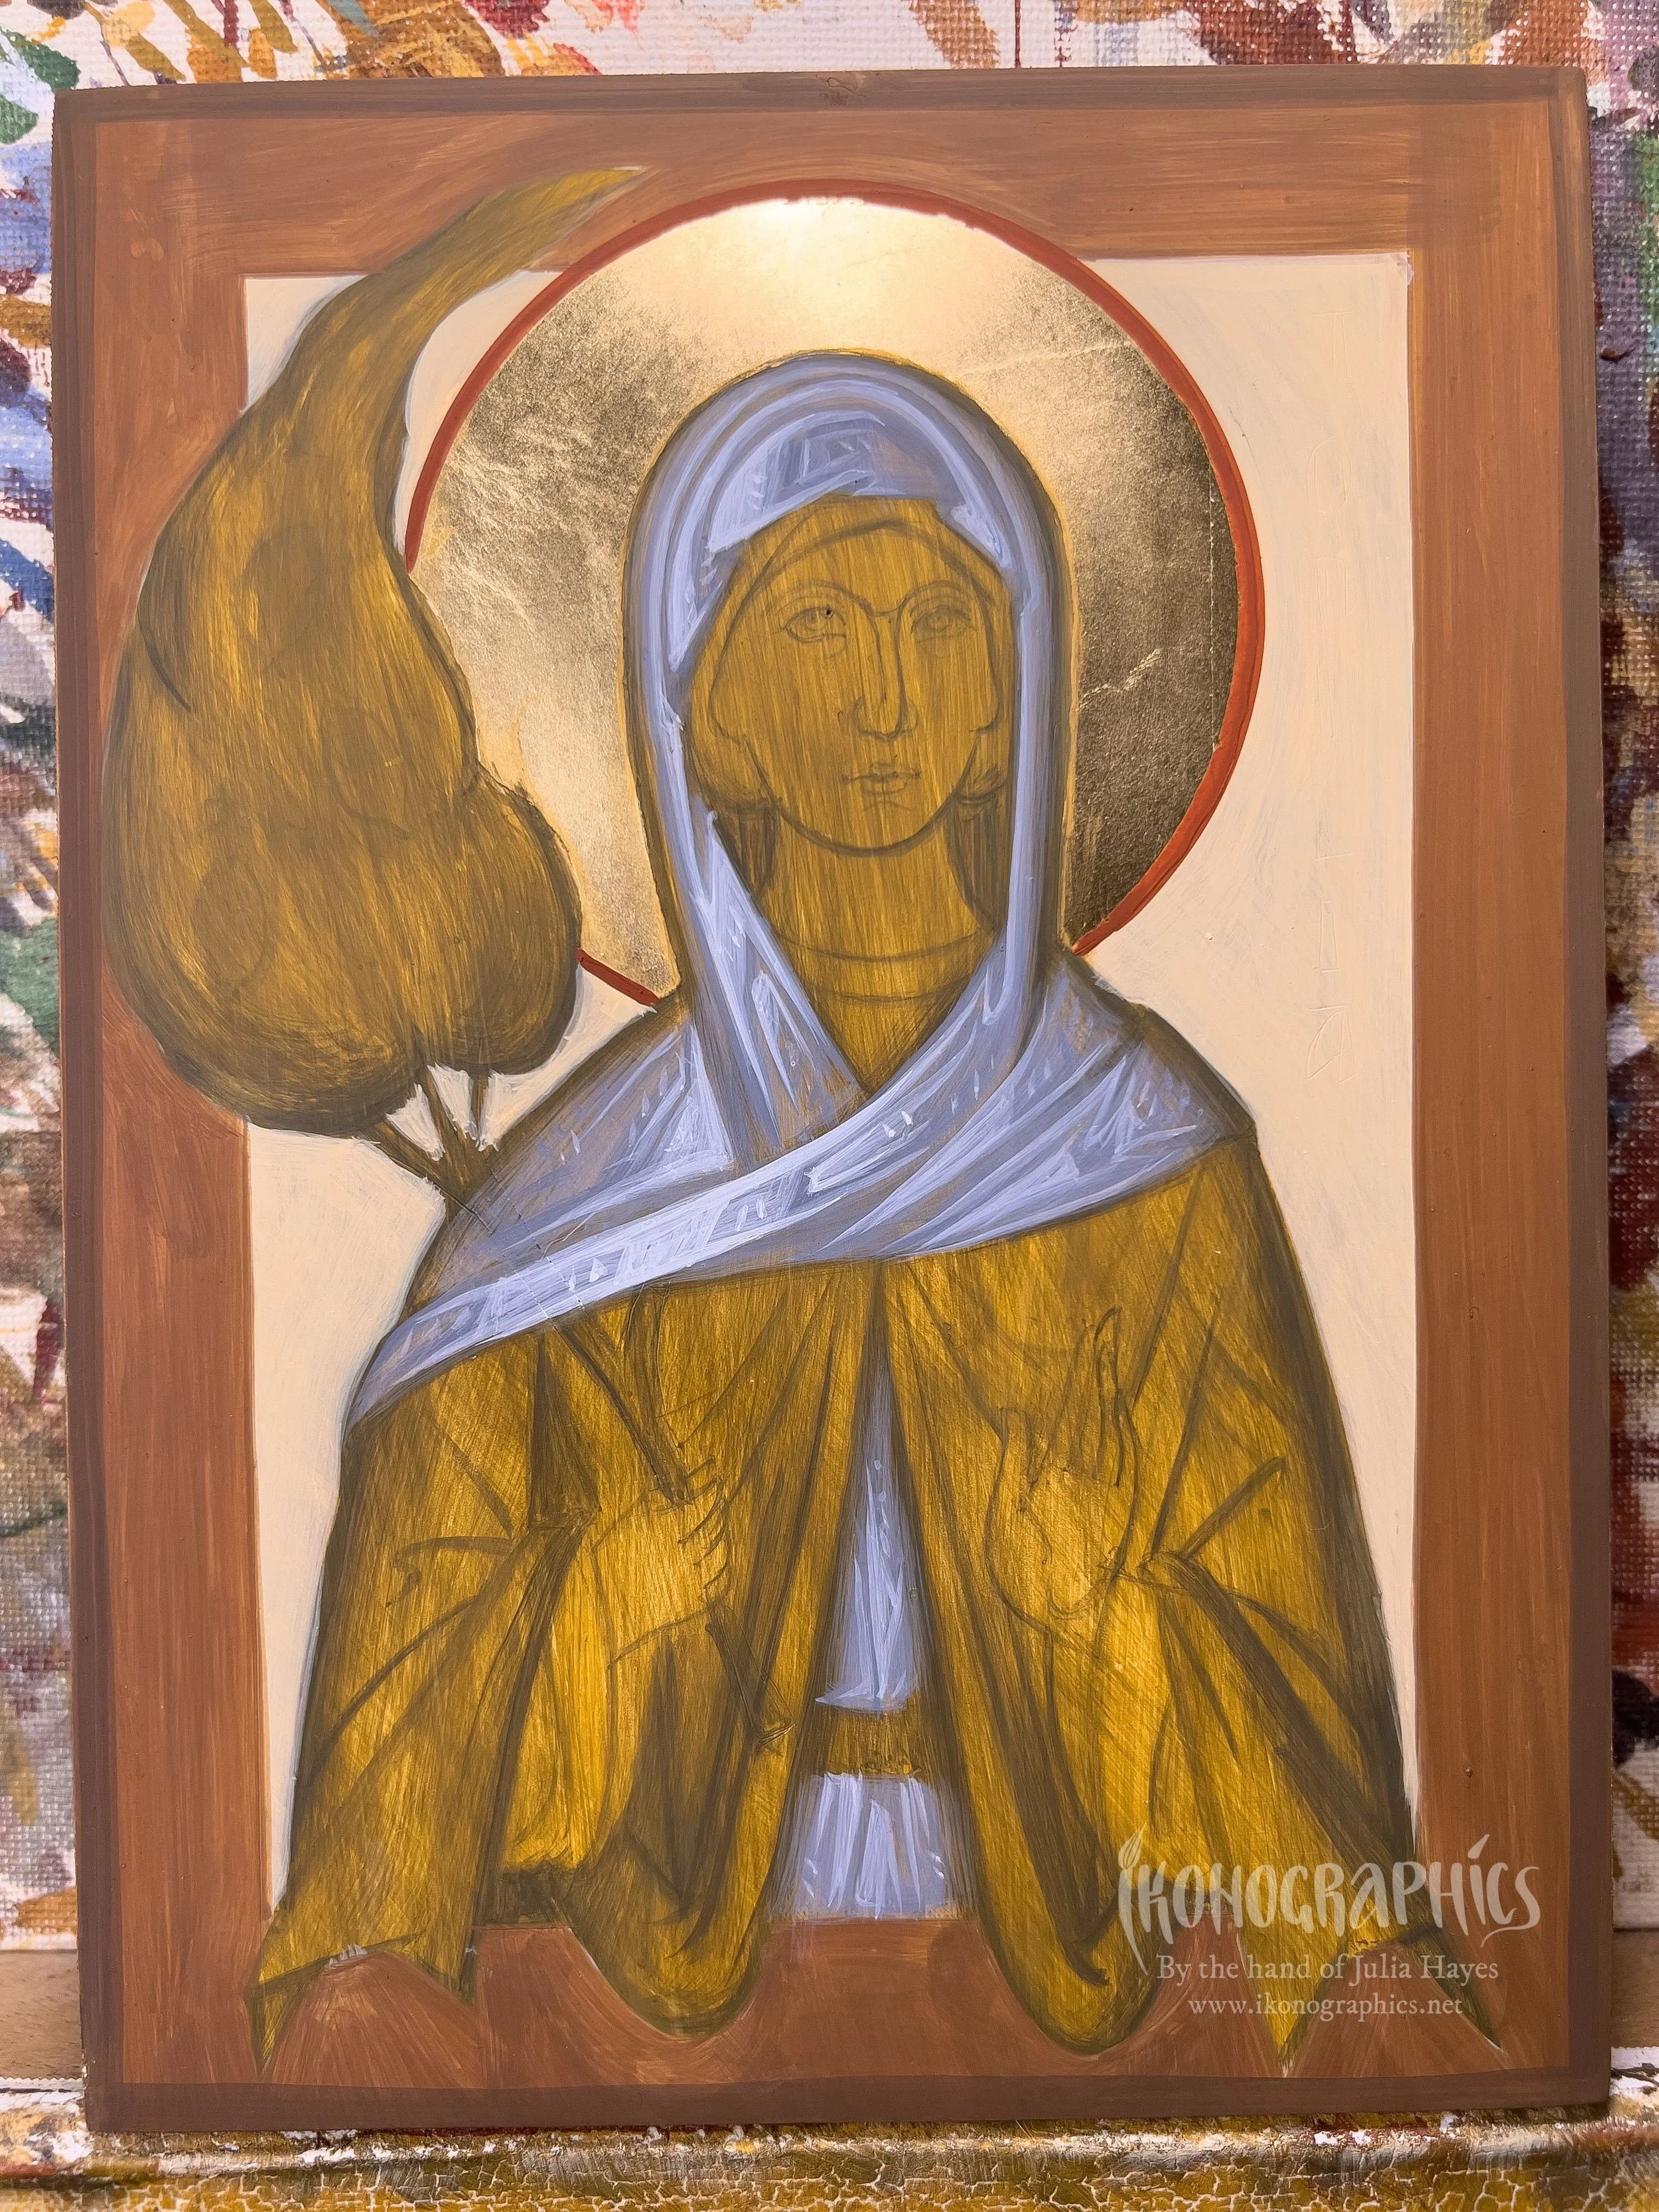
Blue Garments : Proplasmos
For the head covering and schema we’re going to mix a blue proplasmos with black and white. And we start off by diluting some of the colour with egg emulsion and water and painting it in a thin layer over the surface of the garment, building up in the lighter areas, and blending out towards the darker areas.
The bonus video for the blue garments is available on Patreon.

Blue: Forms
Now we take the undiluted proplasmos and start creating the forms as we would for the first photisma.

Blue: 1st Photisma
We add some white to the 1st photisma and create the forms within the 1st.

Blue: 1st Photisma Glaze
Again, for the glaze we dilute the 1st Photisma and create a transition in the lightest areas and from the 1st photisma to the proplasmos.
Blue: 2nd Photisma
Again we add white to the 2nd photisma and create the final highlights on the broader/ lighter side of the figure.

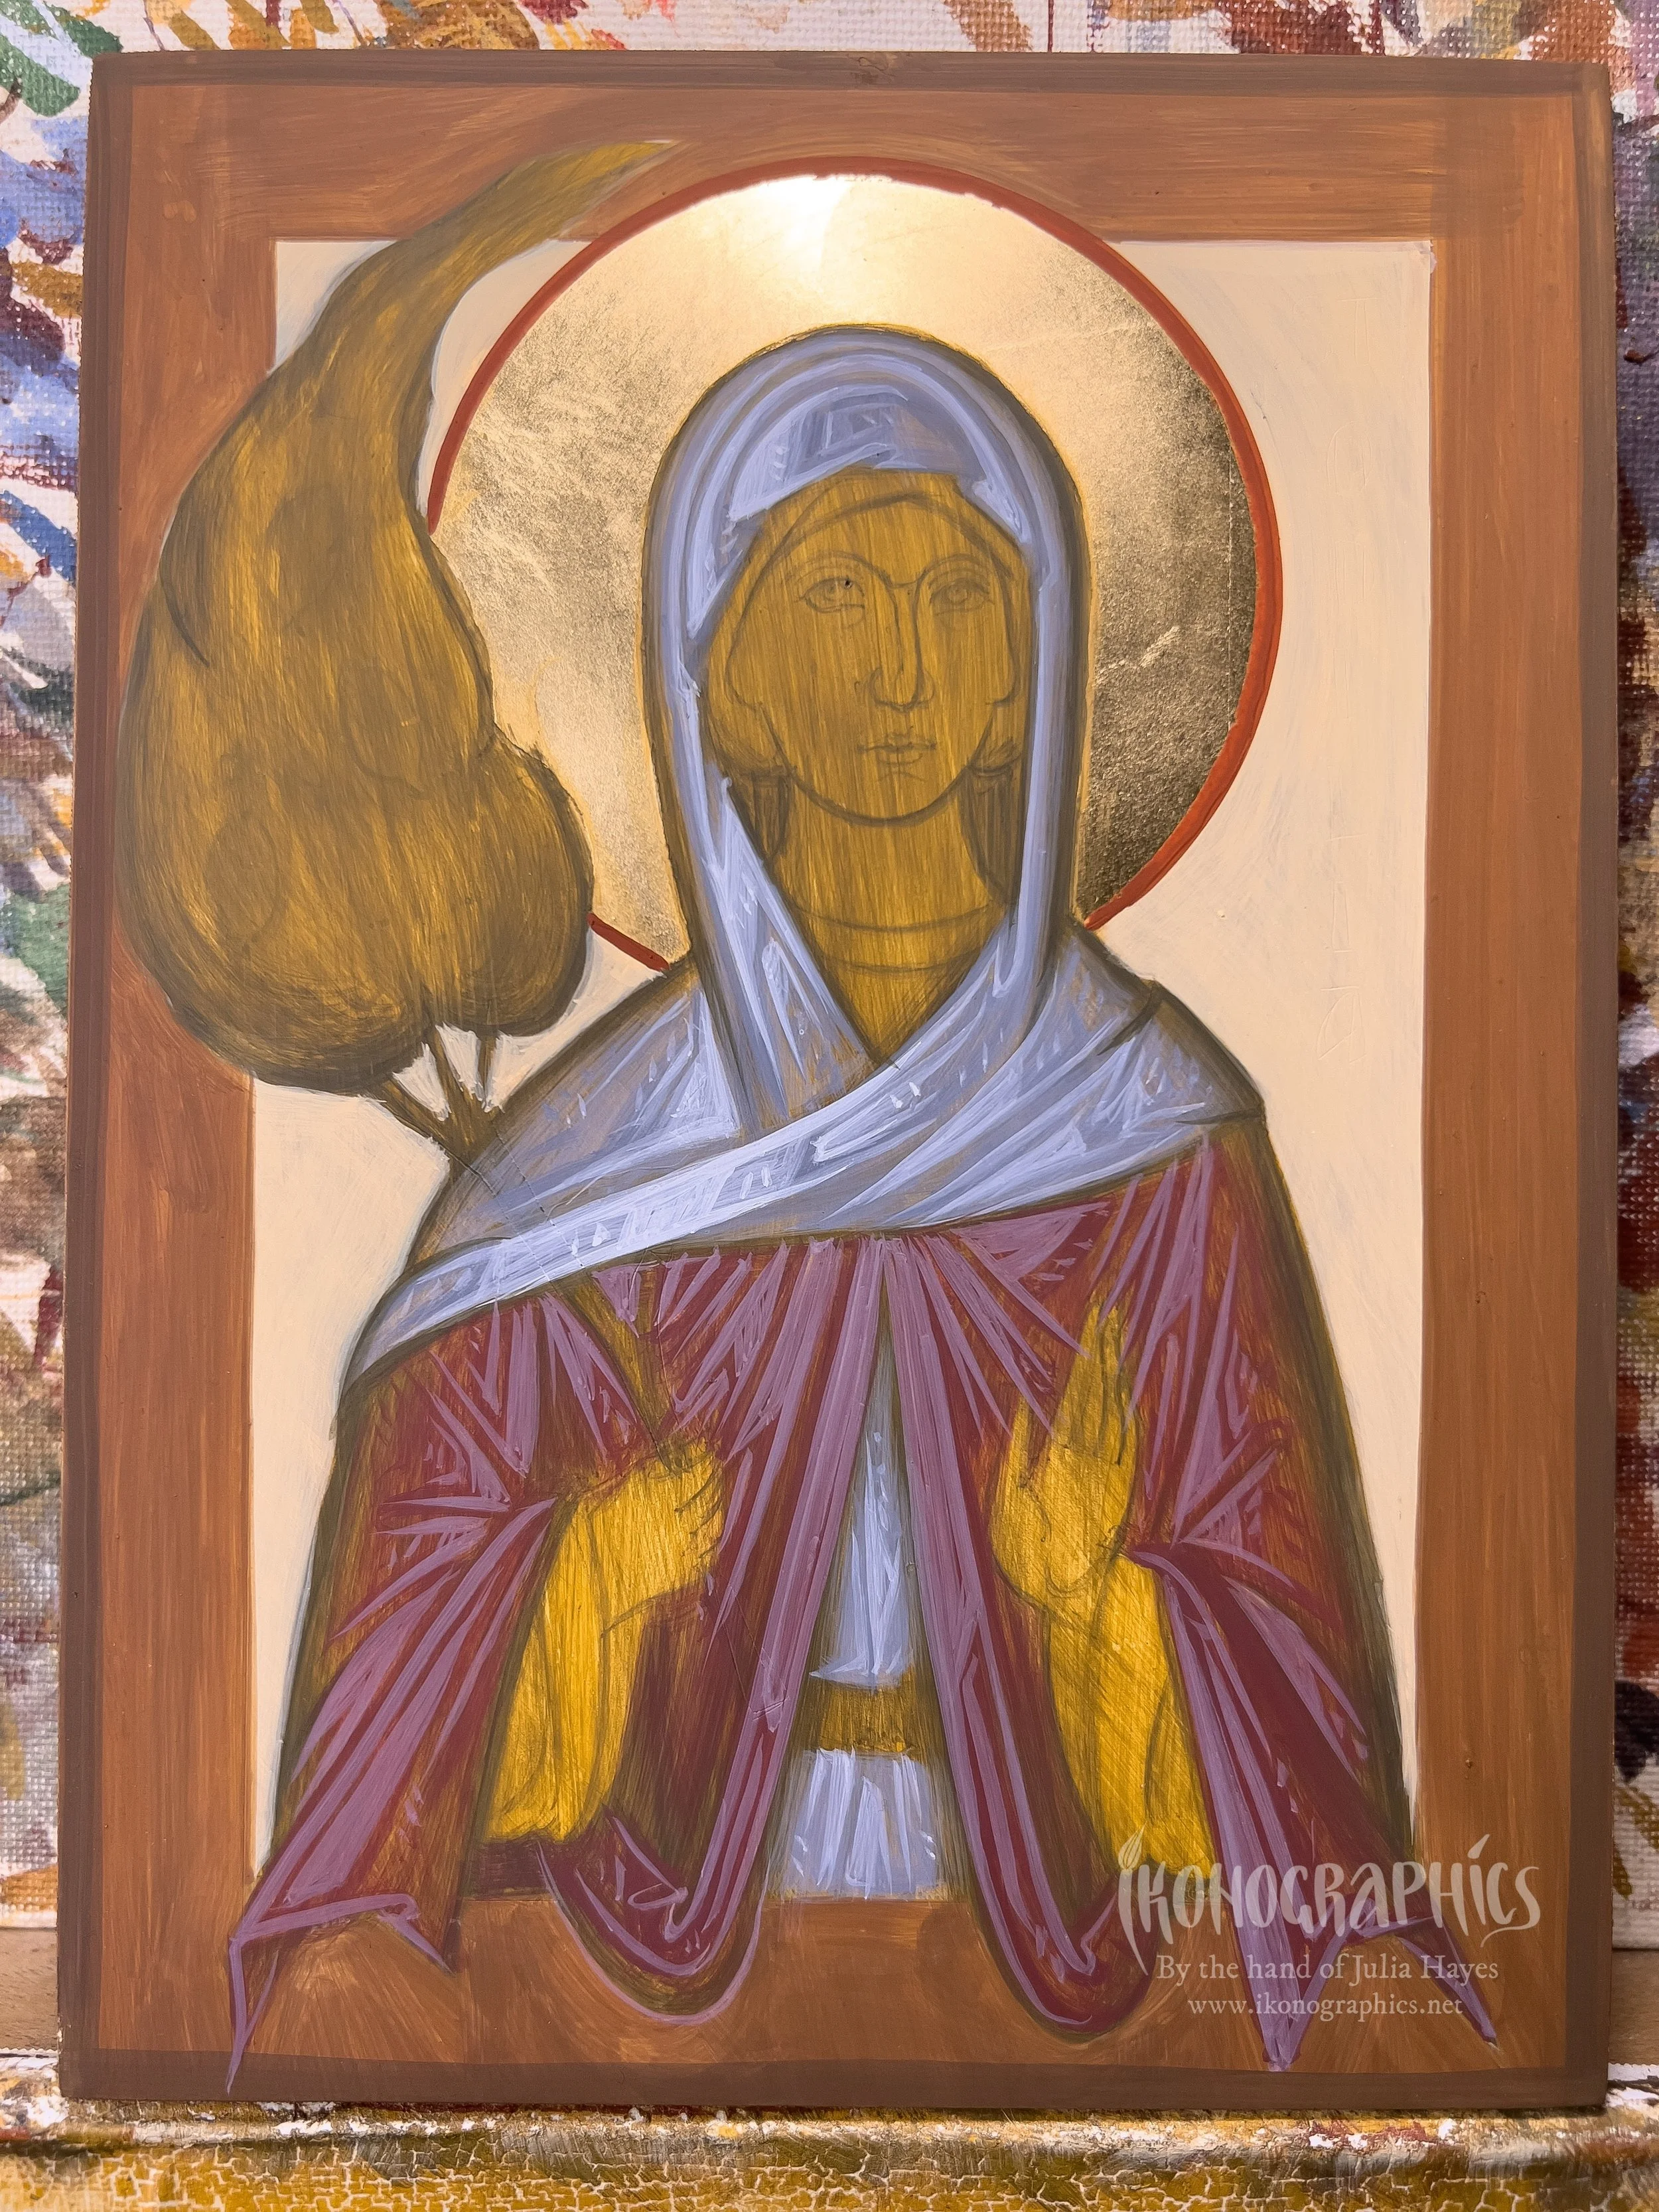
Red: Proplasmos
The red for the mandya is a mixture of medium mars red (to give it a cooler tone), black and a tiny bit of white. Again we dilute some of the colour and cover the surface, building it up where the photismata will be and blending out to the darker areas of the underpainting.

Red: Forms
Again we’re going to create the forms of what would typically be the 1st Photisma.
Red: 1st Photisma
For the 1st photisma I add a touch of black to the proplasmos to cool the colour and then add white.

Red: 1st Photisma Glaze
We then take some of the 1st photisma and dilute it with egg emulsion and water to create a glaze. This we then use to blend the 1st photisma in the lightest areas so that there isn’t a harsh contrast. We also blend the transitions into the proplasmos without losing the forms of the 1st photisma.

Red: 2nd Photisma
For the 2nd photisma we take some of the 1st and again add a little white. We then create the forms within the 1st photisma. As I don’t want this garment to be too light I’m only using two photismata and the second one is only on the broader/lighter side of the figure, which helps to project the figure towards the viewer.

Yellow: Proplasmos & 1st Photisma
For the yellow sleeve I start of withe a proplasmos base of yellow ochre and add white for the 1st photisma and create the forms.
I’ve also cleaned up some of the line work on the other garments using the underpainting.
The bonus video for the following steps is available on Patreon.

Yellow : 2nd Photisma
We add white to the 1st photisma and build up the forms.

Inner Headcovering
For this head covering I have mixed a lilac colour with white, medium mars red, and black. I then painting 1 photisma with the addition of a little white . The stripes are painted with diluted medium mars red.
In the end I again clean up the line work with some of the underpainting.