Painting the Face of St Anthony Step-by-Step (Miniature)
In this tutorial we will be going step-by-step though painting the face of St Anthony. This icon is 15x20 cm so the face is very small. I am using a limited tetrachrome palette of Yellow Ochre, Mars Red, Iron Oxide Black and Titanium white.
The bonus video of the process of sketching the icon of St Anthony is available on Patreon here.

Proplasmos
The proplasmos consists of yellow ochre + mars red + white. As you can see I use it to cover the whole face and beard creating unity between the beard and the face.
The bonus video of the process of painting the grapsimata on the face and beard is available on Patreon here.
1st Grapsimo
The 1st grapsimo is made with mars red and a little black. With it, I create the main forms of the face and beard and build up the darker areas on the cheeks and the edge of the face.

2nd Grapsimo
For the 2nd grapsimo we add a little black to the first and go over some of the darker areas including the eyebrows, the upper eyelid, the darker side of the nose and and build up the darker area on the narrow/darker side of the face and beard.

3rd Grapsimo
For the 3rd grapsimo we add more black to the 2nd. and we use it for the upper eyelid, the pupil of the eye and the nostrils.
Beard Proplasmos
For the beard, we take a little of the face proplasmos (so that the beard will be in harmony with the face) and we add black and white to to create a lightish grey.
Then we take a little of that colour and dilute with egg solution and water to create a glaze with which we colour the whole area of the beard
We the take the first mixture and build up the basic forms of the beard (not photographed -sorry! - but can be seen in the photo below)

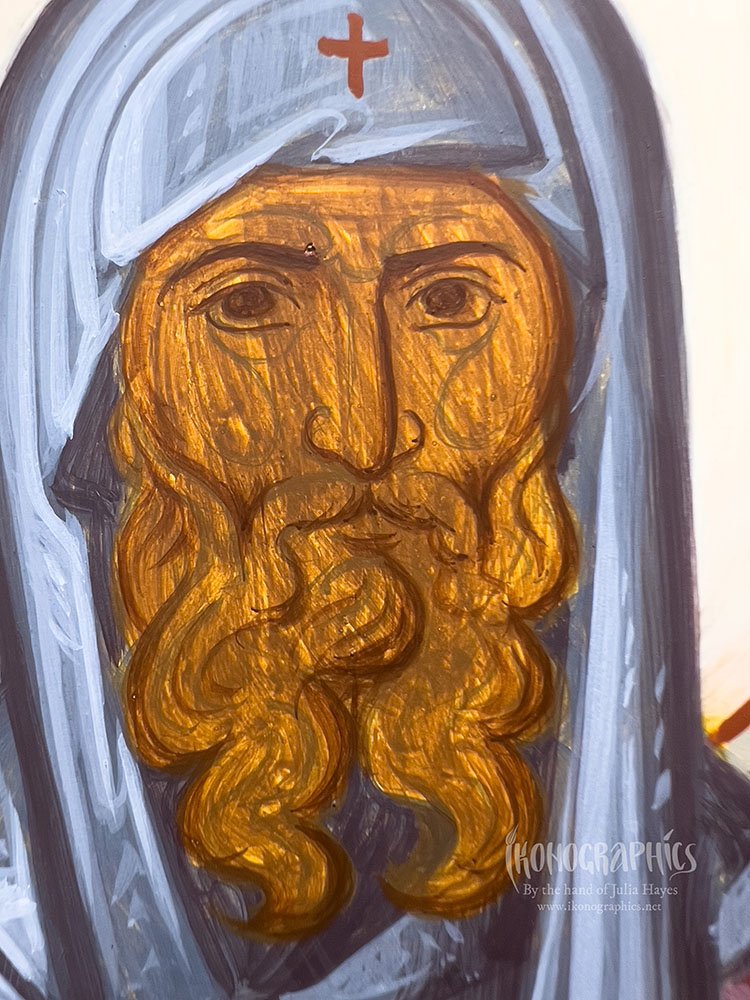
Beard 1st Photisma
The 1st Photisma of the beard consists of the beard proplasmos plus white. And we create smaller forms within the forms we created with the proplasmos

Beard Highlight
The highlights of the beard are pure titanium white and we create them within the forms of the 1st photisma only on the broader/lighter side of the face,.

Face: 1st Flesh
The 1st flesh of the face is yellow ochre and titanium white. You can add a touch of mars red, if you like.
The flesh is blended into the proplasmos in the areas that darken, and build up in the brighter areas of the face.

Face: Cool Glaze
The cool glaze is made with the first flesh, a little black and white and is diluted with egg emulsion and water and is used as a transition between the proplasmos and the first flesh on the lighter side of the face. It can also be painted before painting the 1st flesh. It is cool glaze and the warm glaze we will paint on the darker side of the face that bring the face to life.

Face: 2nd Flesh
The 2nd flesh consists of the 1st flesh with the addition of white. And we build up the forms of the face within the 1st flesh, creating the sense of volume.

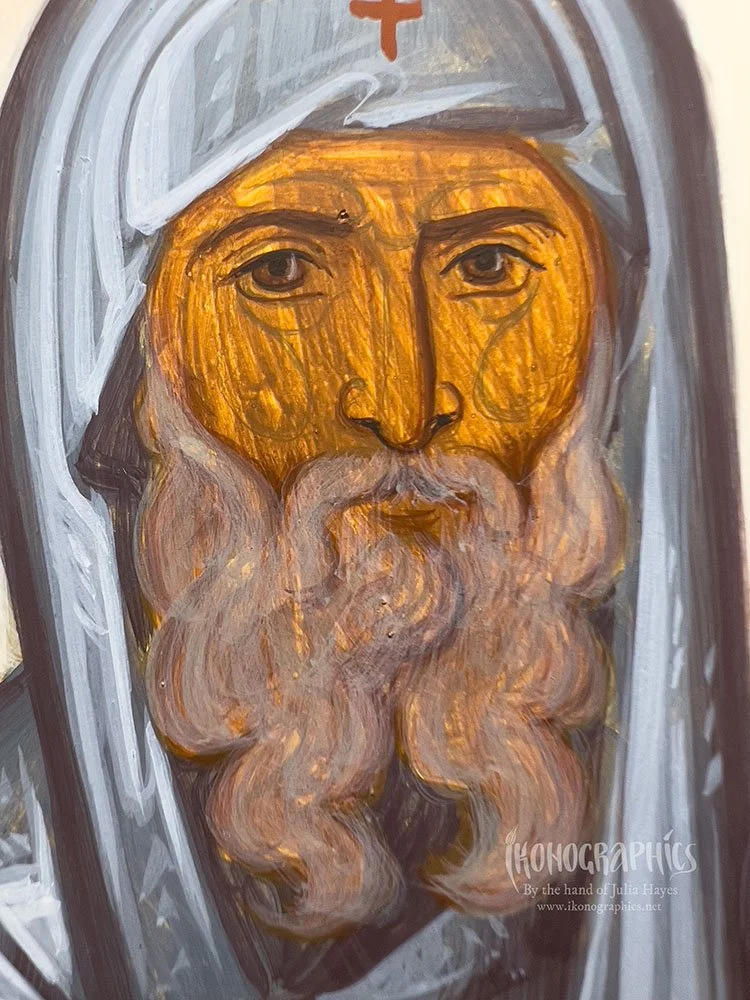
Face: Warm Glaze and 3rd Flesh
Here I painted the warm glaze (consisting of diluted mars red and yellow ochre) on the darker side of the face, the cheeks, to lower lip, the darker side of the nose and bottom of the nose tip and well as the eyelids.
The 3rd flesh consists of the 2nd flesh plus white and is built up in the lightest areas of the face.

1st Psymithia
The 1st psymithia consist of the 3rd flesh plus white and are painted rhythmically in the lightest areas of the face.

2nd Psymithia
The 2nd and final psymithia are painted within the 1st, only on the broader lighter side of the face.
We also paint the white of the eye.

Final Details
Finally with some mars red we add some red at the tearducts of the eyes an a line down the darker side of the nose. I also add a thin line down the darker side of the face, on the bottom of the lower lip and under the chin.

Glory to God!
Are you interested in learning Byzantine Iconography? Learn more about my tutorials on Patreon and Udemy
If you enjoy my content consider buying me a cup of Kofi: https://ko-fi.com/ikonographics